Salesforce Configuration
- Login to Salesforce
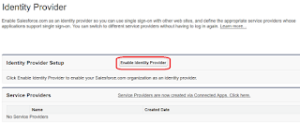
- Go to Setup–>Security Controls–>Identity Provider
- Click on “Enable Identity Provider”
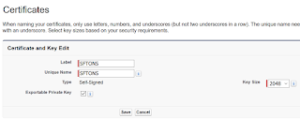
- Select “Create a new certificate…”
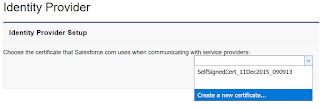
Provide Certificate Label and Unique Name and Click on “Save”.
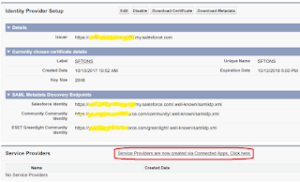
- Click on “Enable Identity Provider” and Select “SFTONS” certificate and click on “Save”.
- Setup Service provider. Click onà“Service Providers are now created via Connected Apps. Click here.”
- Enter following information and click on “Save”.
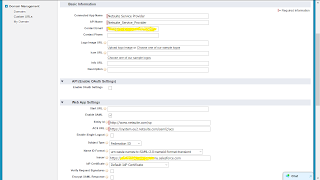
- 1. Issuer
- 1.1. Setup –> Domain Management –> My Domain
- 2. Entity Id – Follow below steps
- 2.1. Login to Netsuite
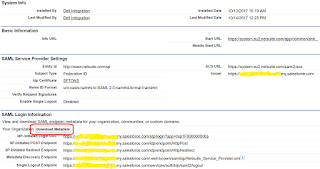
- 2.2. Setup –> Integration –> SAML Single Sign-on
- 2.3. Click on Metadata XML
- 3. ACS URL – Follow below steps
- 3.1. Login to Netsuite
- 3.2. Setup –> Integration –> SAML Single Sign-on
- 3.3. Click on Metadata XML
- 1. Issuer
- After Save. Click on “Download Metadata”
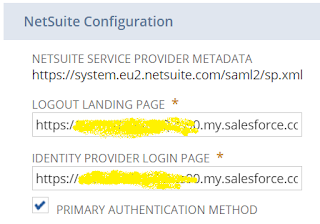
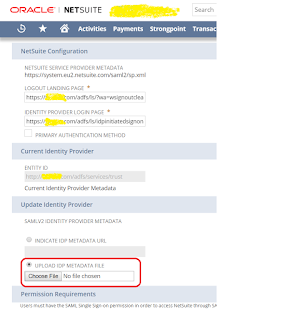
Netsuite Configuration
- Login to Netsuite
- Go to Setup –> Integration –> SAML Single Sign-on
- Select metadata file which we have downloaded from Salesforce Configuration (Step 9).
- Click on “Submit”.
- Go to Setup –> Integration –> SAML Single Sign-on. Provide following information.
- a. LOGOUT LANDING PAGE
- b. IDENTITY PROVIDER LOGIN PAGE

This information is from Step 9 of Salesforce Configuration.
Click on “Submit”.